
How to Draw a Christmas Tree – 9 Easy Styles
By:
Date:
The holiday season is a time of joy, warmth, and creativity. We’ve gathered nine delightful examples of line-drawn Christmas trees, each requiring only 2 or 3 easy-to-follow steps. Join us as we break down the process of drawing a Christmas tree, making it accessible to artists of all levels. Let’s dive into the world of art and holiday cheer as we draw Christmas trees.
I have prepared 9 different samples for you to choose from for your Christmas tree drawing; they vary in style, but all can be drawn in 2-3 simple steps.
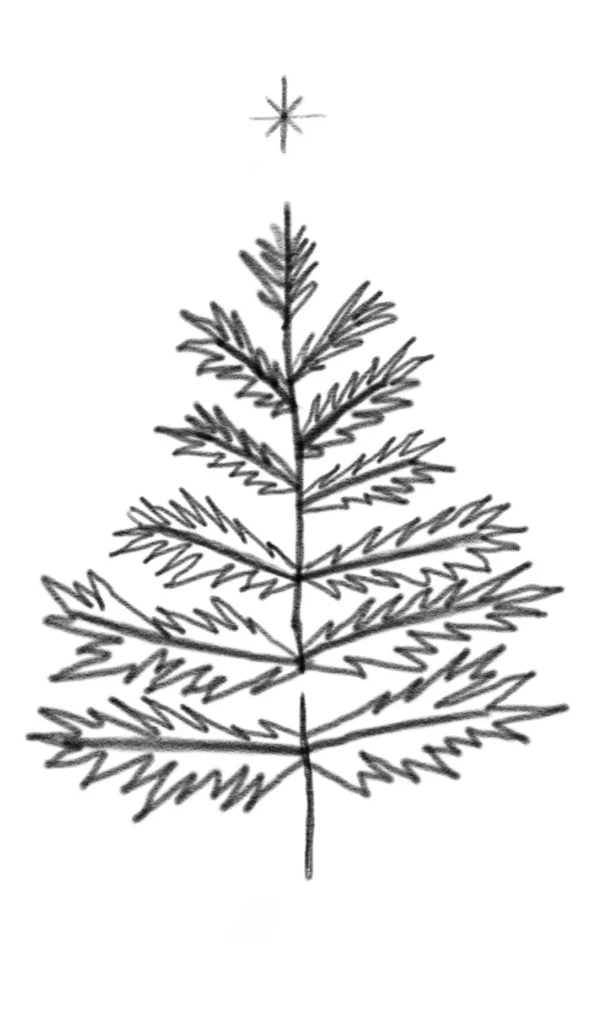
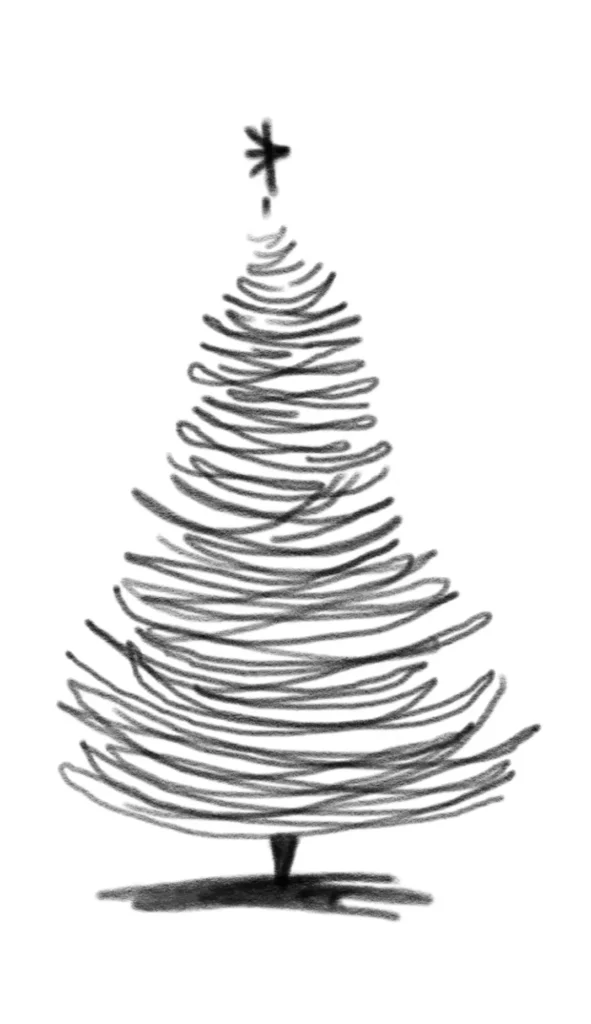
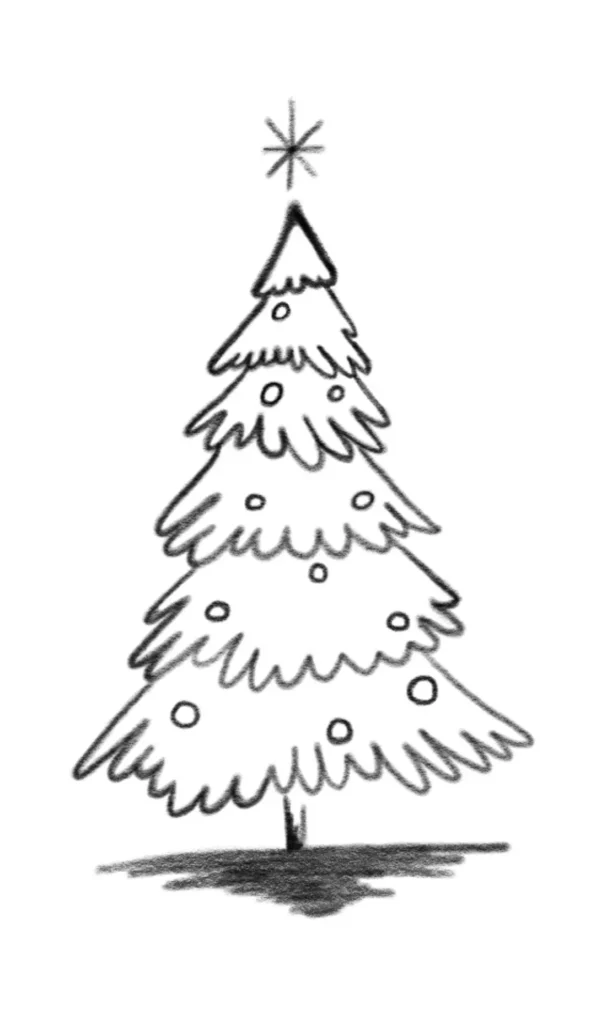
How to Draw a Christmas Tree: Style 1
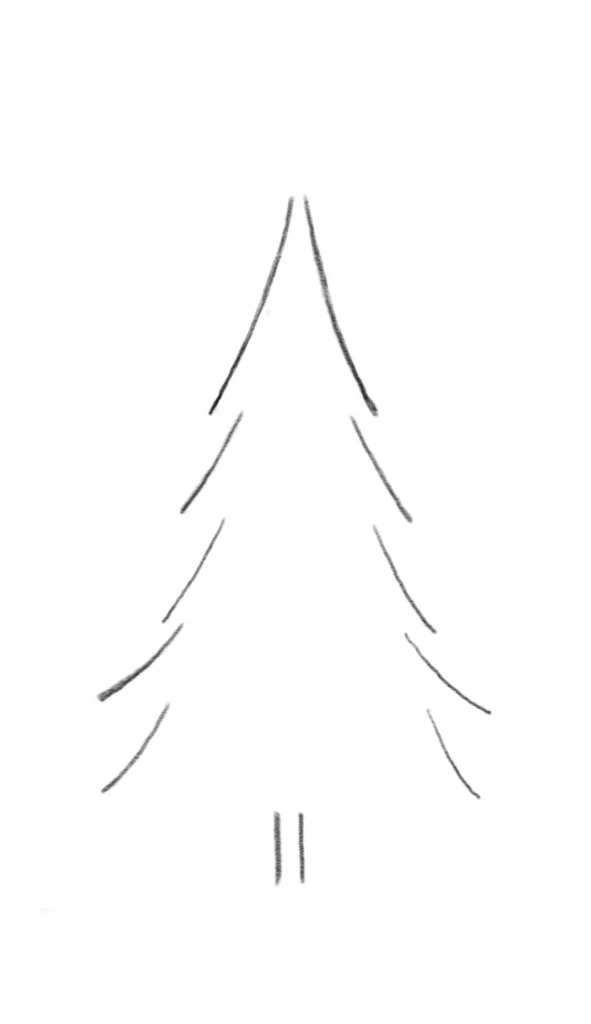
Step 1
To start our Christmas tree, we’ll kick things off at the top section. Begin by drawing slightly angled lines that extend outward from what will become the center of our tree. This sets the stage for a wonderfully symmetrical tree.
Now, let’s delve into the next step of our creative journey. We’ll be adding more branches to our tree. Create four additional rows beneath those initial lines, which will give you a total of 10 lines. As you progress downward, envision each line starting a bit closer to the center and then gracefully extending outward. This gradual widening of the branches is the secret to achieving that iconic triangular shape we all associate with Christmas trees.
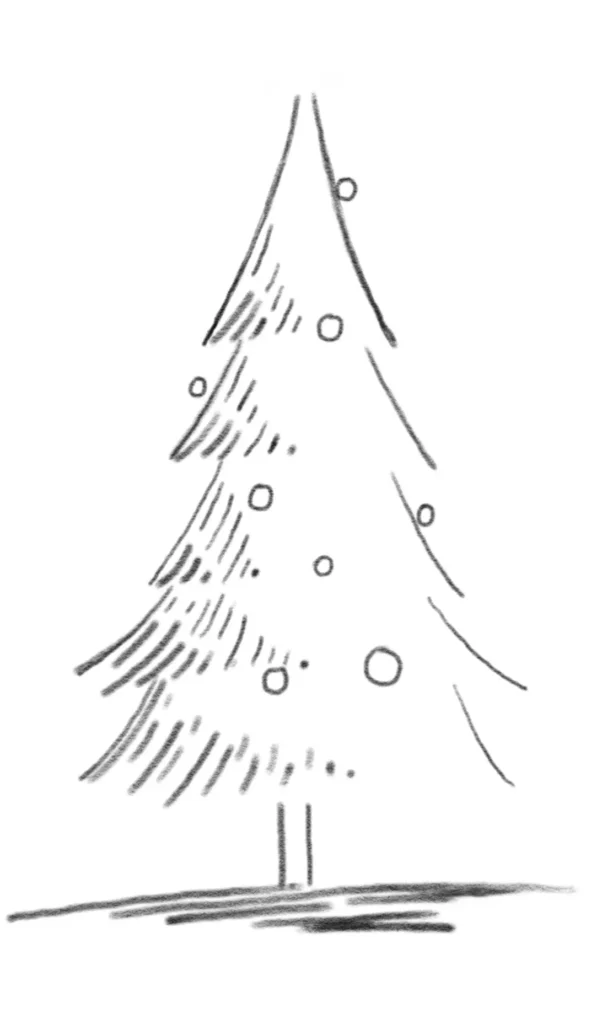
Step 2
After establishing the foundational structure of your Christmas tree, it’s time to elevate its festive appeal. Enhance your tree by adding circular shapes in various spots to emulate charming Christmas ornaments. You have creative freedom when it comes to their placement, allowing you to infuse your tree with a personalized touch that truly captures the holiday spirit.
For a sophisticated touch, consider employing shading techniques on the left side of your tree. Craft lines that gradually diminish in size while maintaining the same level as the current row of branches. This subtle shading effect adds depth and dimension, elevating the visual impact of your tree. Lastly, ground your masterpiece by adding dark, graceful lines beneath the tree to signify the wintery landscape. This finishing touch not only anchors your tree but also imparts a sense of seasonal coziness. With these steps, your Christmas tree will exude elegance and festive charm, ready to grace any holiday setting.
Step 3
After establishing the foundational structure of your Christmas tree, it’s time to elevate its festive appeal. Enhance your tree by adding circular shapes in various spots to emulate charming Christmas ornaments. You have creative freedom when it comes to their placement, allowing you to infuse your tree with a personalized touch that truly captures the holiday spirit.
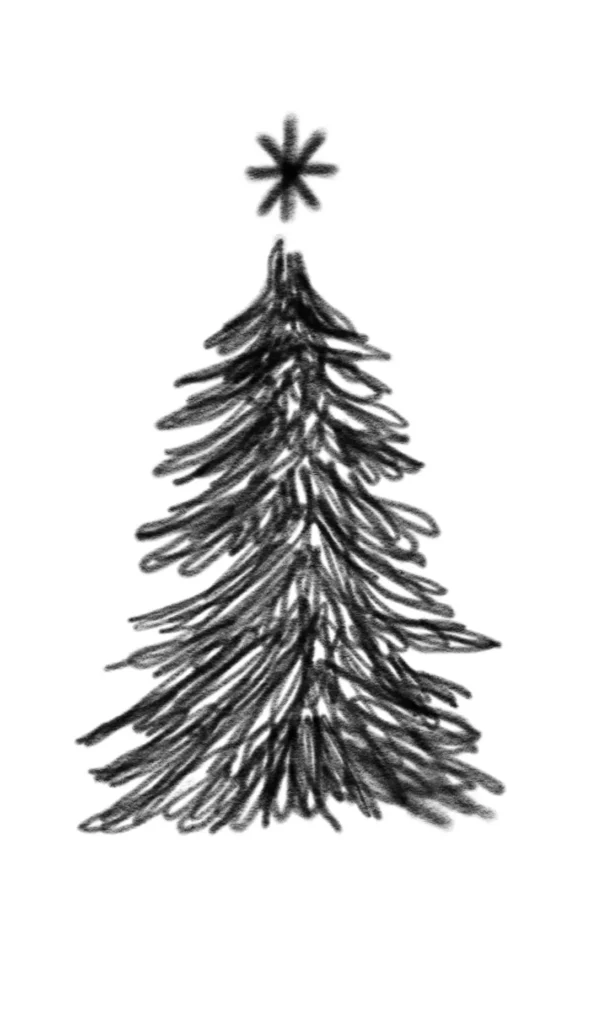
How to Draw a Christmas Tree: Style 2
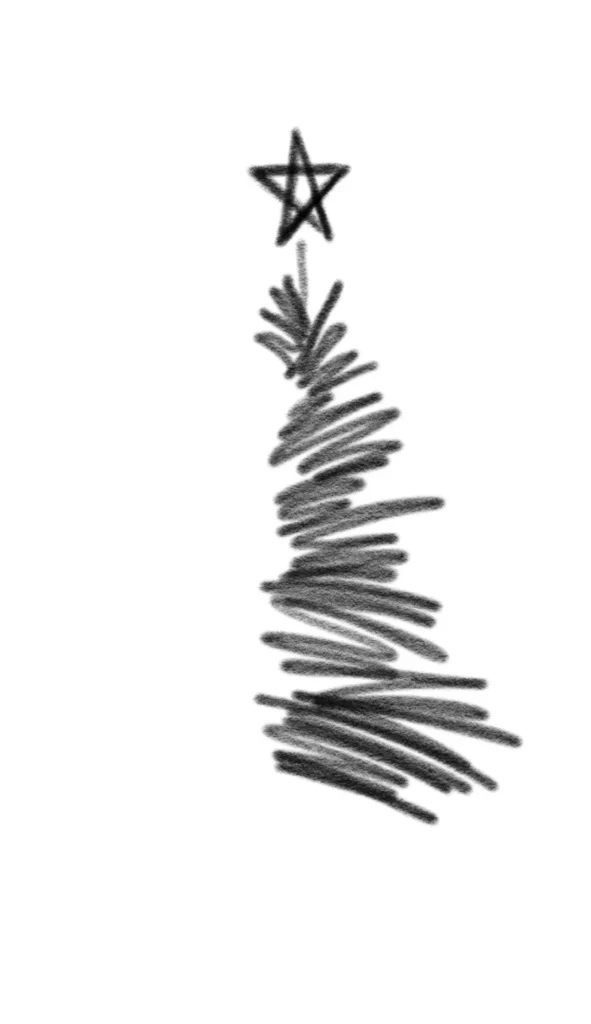

Step 1
In this example, we start by placing a 5-point star at the very top of the tree. Then, you’ll want to draw some closely spaced lines with a pencil. These lines go right below the highest point of the star, both on the top and the right sides. For the next step, on the right side, keep drawing lines with your pencil. Make them extend all the way down to the bottom of the tree’s branches. This precise technique will give your tree a balanced and neat appearance, making it look graceful and polished.
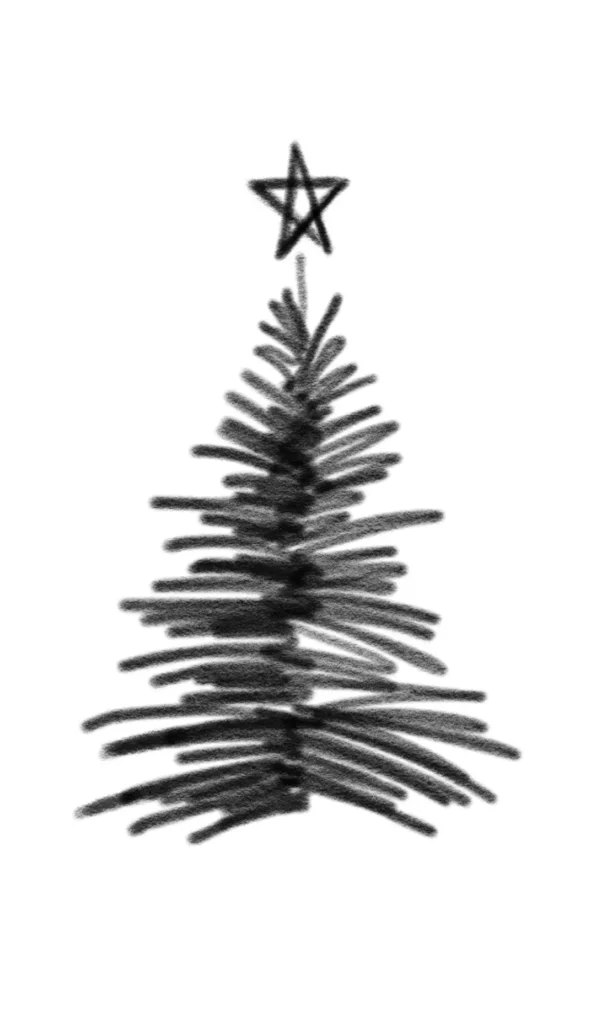
Step 2
Now, let’s follow the same procedure by crafting pencil lines on the left side of the tree. Afterward, introduce some vertical pencil lines at the central base of the tree, positioned directly under the tree branches. Beneath that, incorporate some horizontal black lines to represent the ground section. Well done! With these steps, you’ve successfully finished creating your 2nd style of Christmas tree.
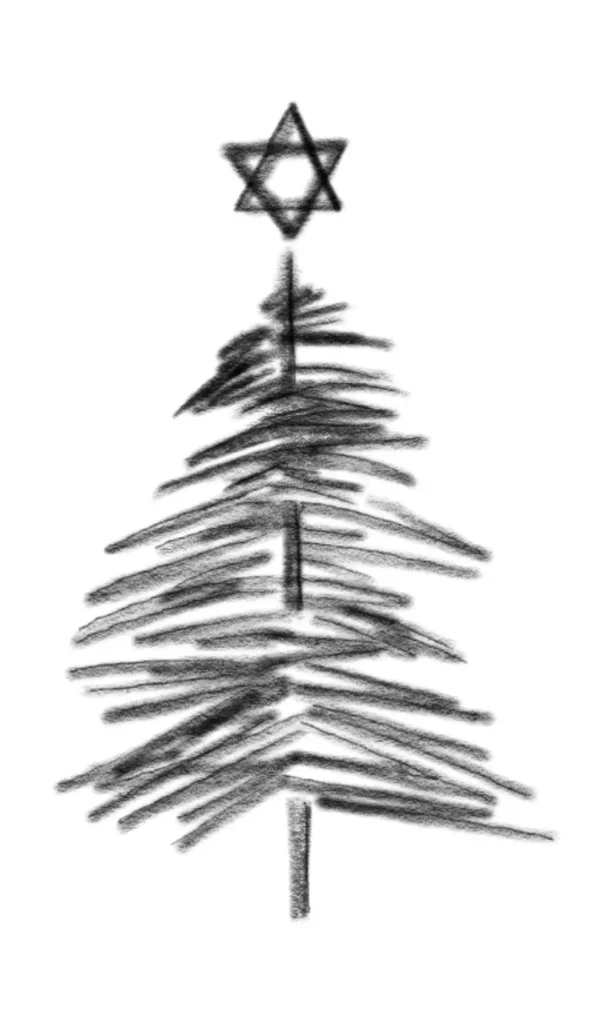
How to Draw a Christmas Tree: Style 3


Step 1
Begin by drawing four lines that intersect to form a star shape. Below the star, draw a straight line going downward; this will serve as the central trunk of your Christmas tree.
Now, create the branches by drawing lines extending out to the left and right. To add a festive touch, at the top of each branch, draw sharp, wavy lines that start from the outer end and return to the base of the branch. Repeat this for all the branches on your tree.
Step 2
To finish up, simply draw a cluster of closely spaced black lines at the bottom of your tree, and you’re all set! Great job on creating your 3rd style of Christmas tree!
How to Draw a Christmas Tree: Style 4

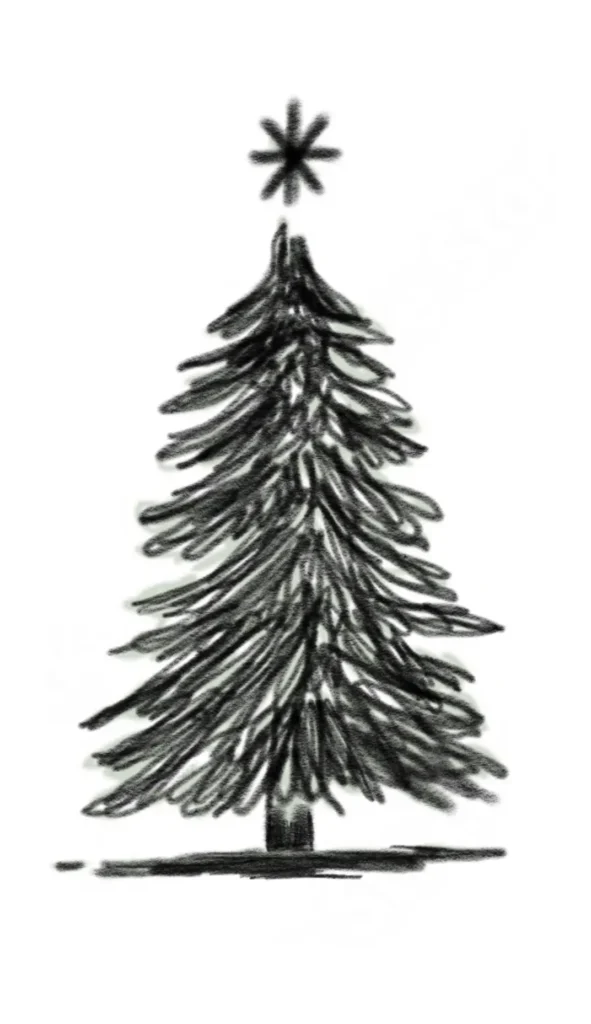
Step 1
To start, draw four black lines that converge in the center, forming a star at the tree’s top. Next, let’s add some character to the branches. Draw wavy lines that begin in the middle of the tree and then extend outward. As you approach the center again, make the lines almost straight down with less curvature. Continue drawing these wavy lines from the top of the tree down to its base.
Step 2
To complete your tree, add a thick dark line right in the middle, at the bottom, under your tree branches. Afterward, draw some black lines horizontally just below that thick line. And voilà, you’re all done! Great job on your beautifully drawn tree!
How to Draw a Christmas Tree: Style 5

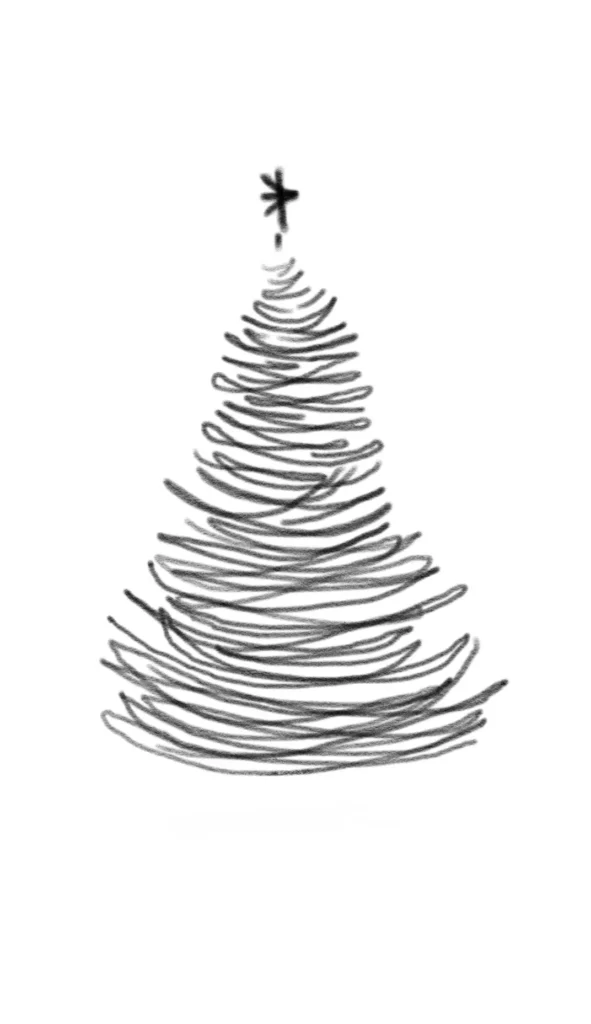
Step 1
To begin, let’s craft the star at the tree’s pinnacle. Draw a vertical line and cross it with a horizontal line to create the foundation. Add two more lines on the right side, forming a star shape.
Now, let’s fashion the tree’s branches. Draw curvy lines that stretch from the tree’s top to its bottom, moving from left to right. If it helps, you can rotate your tablet or sketch pad sideways to simplify the process of sketching these curvy lines.
Step 2
To complete the bottom of the tree, draw a few black lines extending both upward and downward. Following that, just below those lines, add some horizontal dark black lines to create the ground under your tree. Fantastic work! Your tree is now complete.
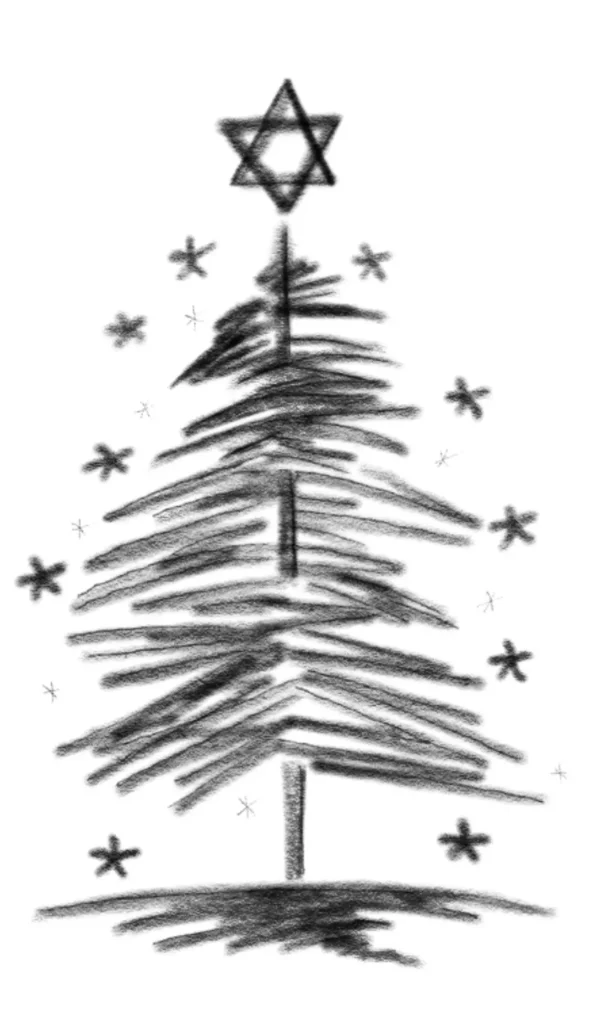
How to Draw a Christmas Tree: Style 6

Step 1
Begin by drawing a triangle.
Next, create another triangle on top of the first one, but this time, make it upside down.
Now, underneath the star, draw three vertical lines with some space between them.
To add some detail to your tree, starting from the top, draw a series of straight lines on the right side and then on the left side, continuing all the way down.
Step 2
To complete your drawing, add some horizontal black lines to depict the ground.
Now, let’s bring some sparkle to your tree. Draw small 5-point stars in various spots around the tree, adding a touch of holiday magic. Additionally, draw three lines that resemble sparkling stars, extending downward on the tree branches.
Congratulations! Your tree is now beautifully finished, adorned with a sprinkle of festive charm. Great job!
How to Draw a Christmas Tree: Style 7

Step 1
Start by drawing a plus sign (+).
Cross this plus sign with the letter ‘X’ to create a four-line star shape.
A bit lower, where you want the base of your tree to be, draw several vertical lines going upward.
At the bottom of these vertical lines, draw a horizontal line to form the base of your tree.
The space between the star and this base is where we’ll add the leaves of our tree.
Step 2
Begin your tree drawing by starting just below the star. Draw two diagonal lines that slant downward; these lines will serve as a guide for how the tree branches spread out as we move towards the base.
Now, connect those two diagonal lines with a series of curvy and arching lines. Continue this step until you reach the bottom, allowing the tree’s branches to take shape and give it a natural, festive look.
Step 3
To adorn your tree, scatter circles randomly across it to create the appearance of Christmas ornaments.
Additionally, enhance the ground by adding more black lines at the bottom to create a darker and shaded effect.
Fantastic work! With these final touches, you’ve successfully completed your Christmas tree drawing. Great job!
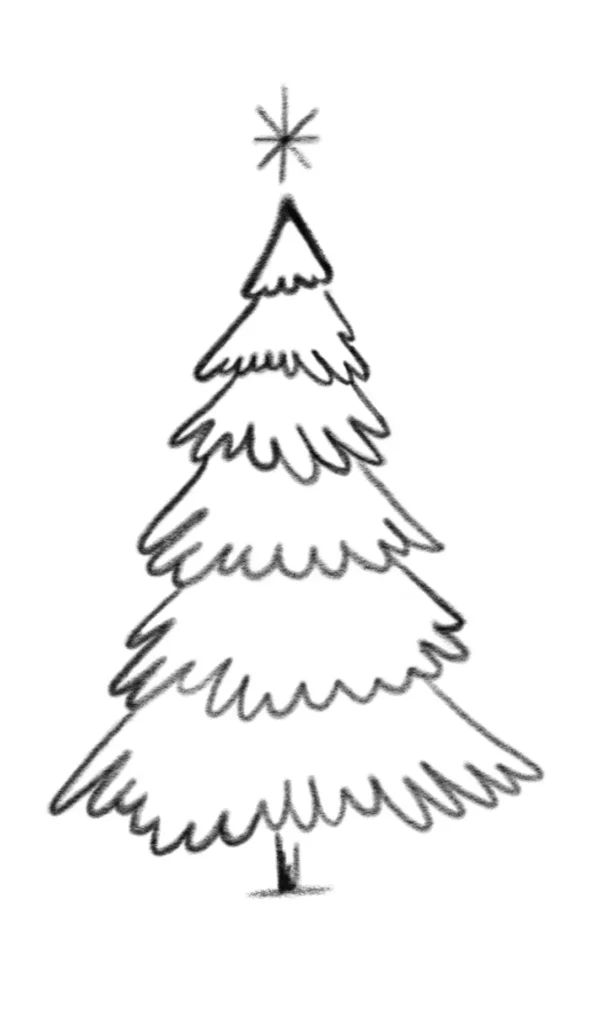
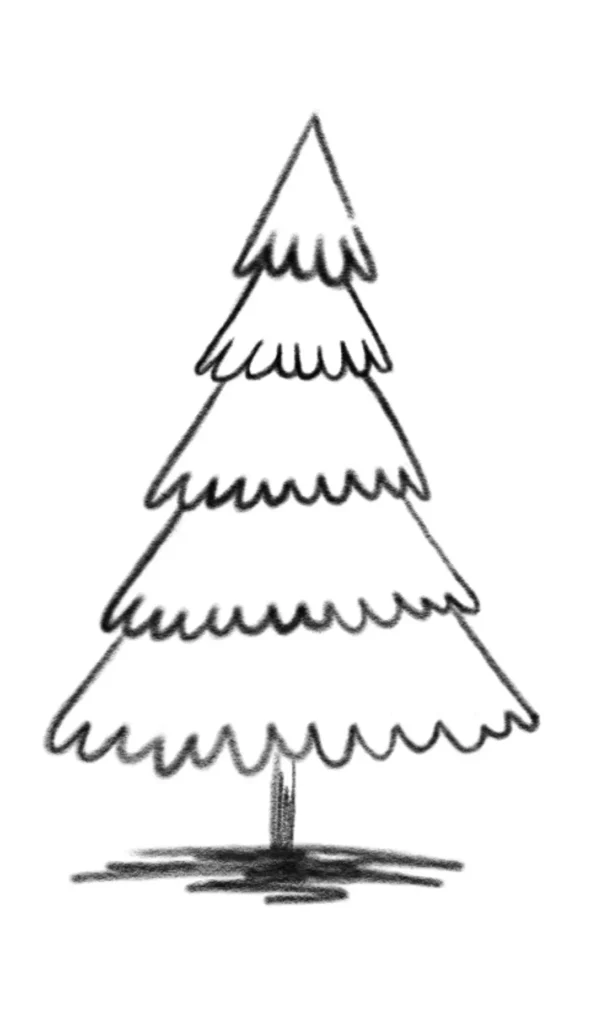
How to Draw a Christmas Tree: Style 8
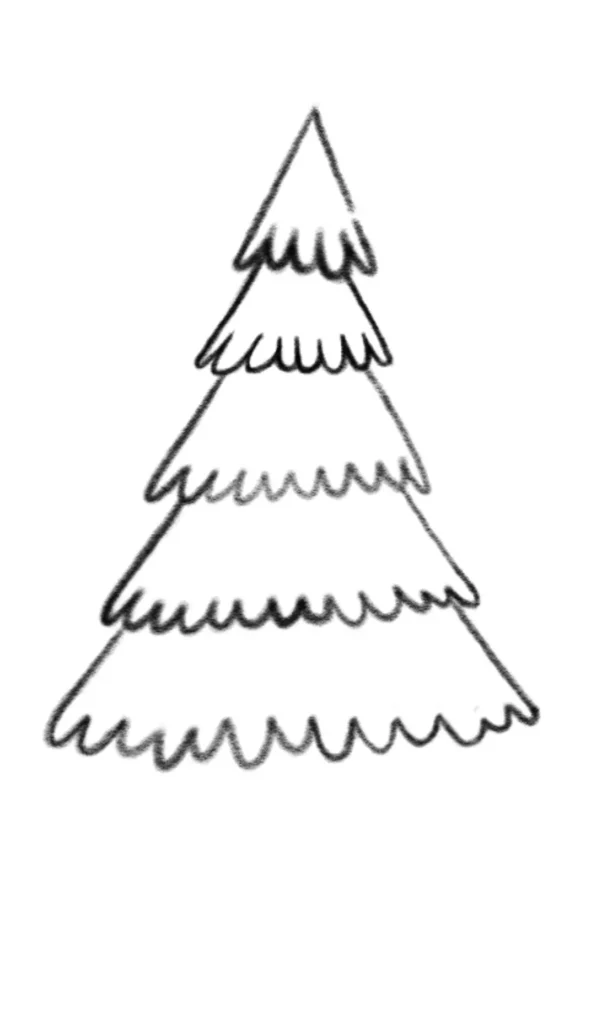
Step 1
To start, draw two slanting lines meeting at the top, forming a triangle which represents the tip of the tree.
Next, create a row of ‘U’ shapes, aligning them horizontally. Ensure that each ‘U’ shape connects to the one next to it, starting from the top of the tree. Repeat this process around five times in total to build the layers of your tree branches.
Step 2
To complete your Christmas tree, add a thick, straight black line in the middle at the bottom, which represents the tree’s trunk. Then, draw slightly curving horizontal lines to form the ground beneath.
Awesome job! Your Christmas tree is now beautifully finished and ready to spread some festive cheer.
How to Draw a Christmas Tree: Style 9


Step 1
To get started, draw a big ‘U’ shape. Then, create two diagonal lines that meet at the top on the left side. Just below that, on the lower left, draw a small, short diagonal line. There you have it – a stylish and simplified star!
Step 2
Next, let’s add some delightful ornaments to your tree. Begin by drawing a bunch of wavy circles, starting from the top right under the star. Continue making a row of these wavy circles and ovals, and repeat this for each row until you’ve reached the bottom of your tree. This will give your tree a festive and playful appearance.
Step 3
To finish your tree, focus on the lower part. Create a series of interconnected lowercase ‘e’ shapes to form the trunk.
Next, draw some horizontal lines just beneath to depict the ground.
For that extra touch, add some lines around the tree to make it gleam and stand out.
Well done! You’ve beautifully crafted your tree with flair and finesse.
Conclusion
Keep in mind that each Christmas tree you draw can be personalized to match your own style and preferences. Don’t stress over making them flawless, and don’t be too critical if they don’t turn out exactly as you intended. Remember, drawing is a continuous journey, and your skills will naturally improve as you work on more projects.
I hope you’ve had a great time drawing these Christmas trees and that you’ve found this guide to be a valuable resource on your artistic journey.
Happy drawing!