Setting up parallax in Godot 4 couldn’t be any easier.
In this short tutorial, you’ll have your parallax background up and running in no time!
With just a few simple steps, you can add depth and movement to your 2D scenes, making your game more immersive and visually appealing. Whether you’re transitioning from Unity or Unreal, or you’re just looking to polish your Godot skills, this guide will walk you through everything you need to know to get started with parallax effects.
Let’s dive in and give your game that extra layer of dimension it deserves!
Understanding Parallax in Godot
Before diving into the technicalities, it’s important to understand that in Godot, parallaxing is achieved through the ParallaxBackground and ParallaxLayer nodes.
These nodes work together to simulate depth by having background images move at different speeds relative to the camera movement without the need to write a single line of code!
Setting Up Your Project
Open Godot and start a new project or open an existing one. Make sure you have your background images ready. These should be larger than your game’s viewport to ensure a smooth scrolling effect.
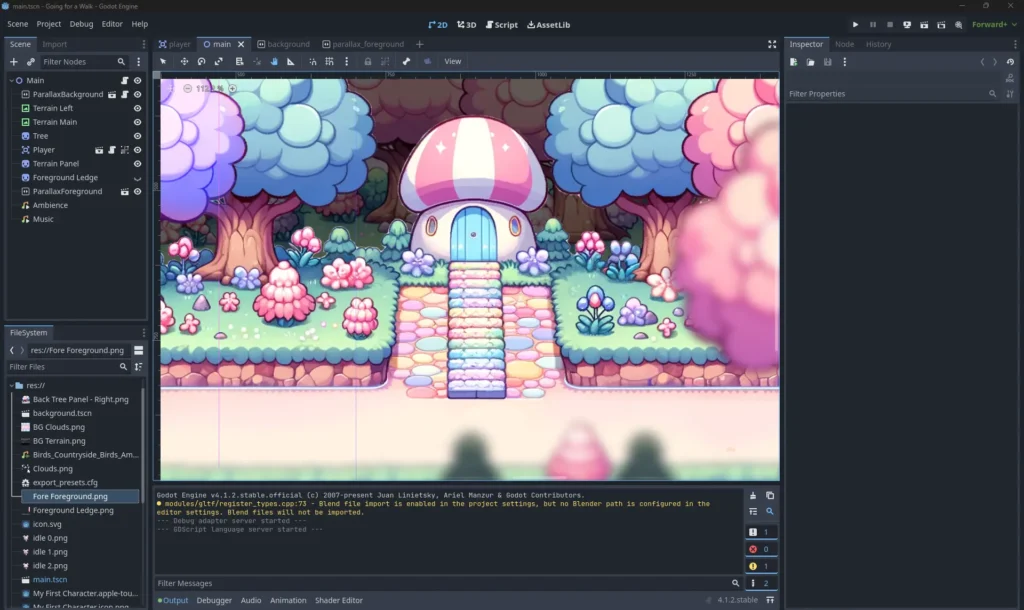
Here’s my project’s setup.
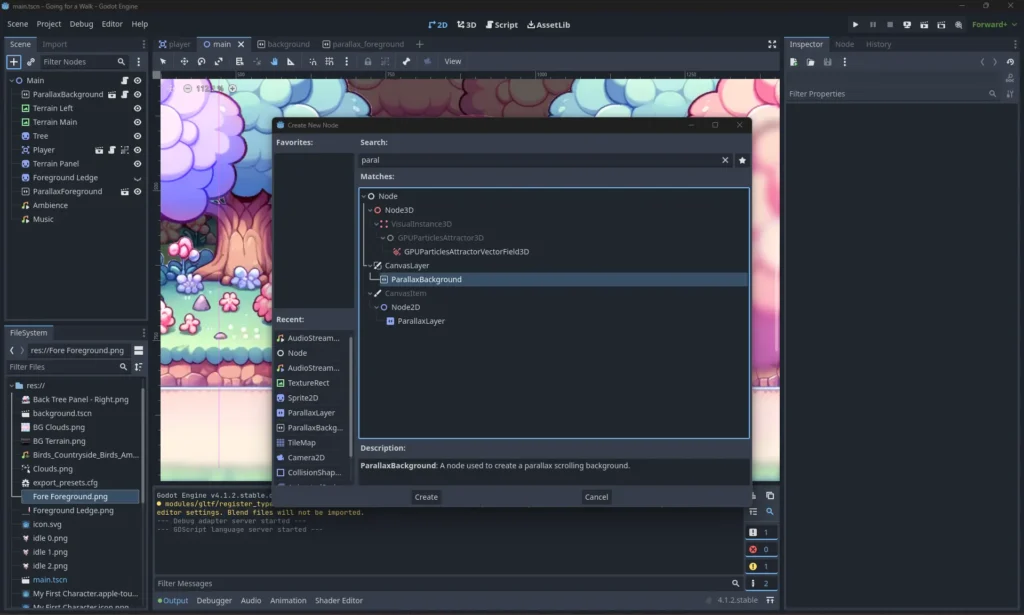
Creating a ParallaxBackground Node
In your scene tree, add a new node and select ParallaxBackground. This node will serve as a container for your ParallaxLayer nodes and will control the overall parallax effect.
Adding ParallaxLayer Nodes
For each layer of your background (e.g., distant mountains, clouds, a foreground), create a ParallaxLayer node as a child of the ParallaxBackground. These layers will move at different speeds to create the depth effect.
Because Nodes are placed in layers, with the lowest layer appearing atop of all layers above it, you will need two ParallaxBackgrounds if you want a background and foreground. In my scene, I have both a Parallax background and foreground, therefore I have two ParallaxBackground nodes.
*I like to create everything as a scene first, and then instantiate it under a “Main” or “Level” scene. Godot is OOP, after all. So both ParallaxBackgrounds (one for the background and one for the foreground) are two separate scenes that have been instantiated as a child-node of Main.
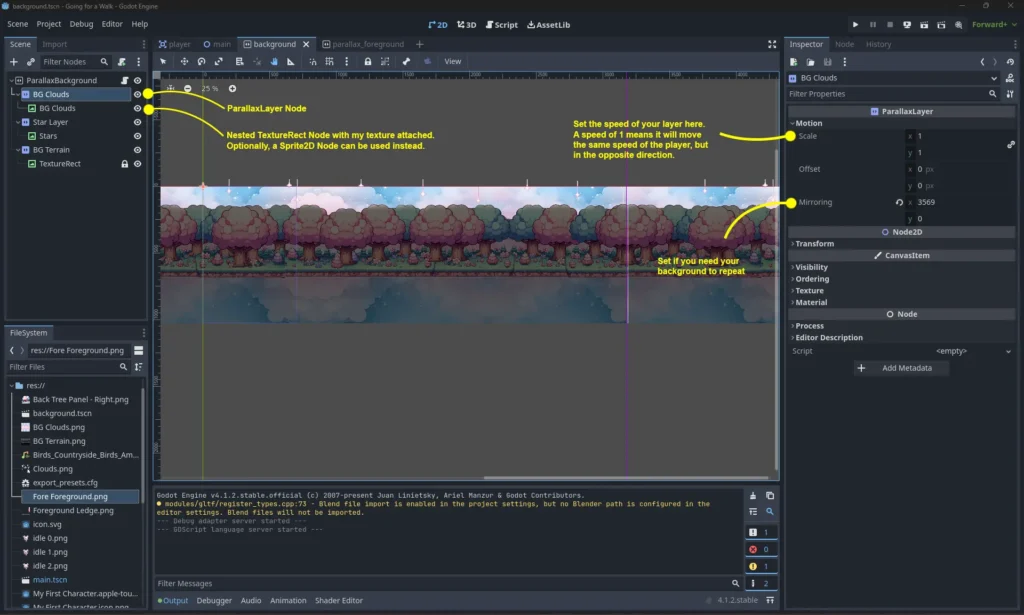
Importing and Setting Up Your Images
Within each ParallaxLayer node, add a Sprite node or a TextureRect node, depending on your preference. Import your background images into these nodes. Adjust the ‘Motion > Scale’ property of each ParallaxLayer to determine how fast the layer moves.
Smaller values will make the layer move slower, enhancing the depth effect.
Scripting for Parallax Movement (Optional)
Although not always necessary due to Godot’s built-in properties, scripting can give you more control over the parallax effect. You can write GDScript to dynamically adjust the ‘Motion Offset’ property of the ParallaxLayer to respond to player movements or other in-game triggers.
Fine-Tuning Your Scene
The key to a successful parallax effect is in the details. Experiment with different speeds for each layer, consider adding additional layers for complexity, and adjust your images’ position to ensure seamless looping.
Testing and Optimization
Run your scene and observe how the parallax effect contributes to the depth of the scene. Look for any visual hiccups that may disrupt the immersion and adjust accordingly. Optimization is crucial for maintaining performance, so ensure your images are appropriately sized and not consuming more memory than necessary.
Conclusion
Parallax scrolling in Godot can transform a flat 2D scene into a dynamic and immersive experience. By following these steps, you can create visually captivating environments that draw players into the game. As with any aspect of game development, mastery comes with experimentation and practice. With Godot’s user-friendly interface and powerful capabilities, the only limit is your imagination. Happy developing!