The Ultimate Guide to Halloween Pumpkins: Choosing, Carving, Decorating, and Going Green
By:
Date:
Get ready for fall fun with pumpkins! Autumn is here as the weather turns cooler and the leaves change color. A unique custom is selecting the best pumpkin. You can turn it into a spooky decoration or celebrate the beauty of fall. This guide is for you whether you’re a beginner or an expert at pumpkin carving. Learn how to choose the appropriate pumpkin size and stem for your pumpkin ideas and learn how to find pumpkins that are at their freshest. Your carvings and fall décor will be amazing.
Carved Halloween Pumpkin Design Ideas
Not all pumpkins are created equal, so keep that in mind as you choose them for carving. Pumpkins come in more than 100 different varieties. Some are great for making desserts, while others are better for carving into shapes or for decorating.
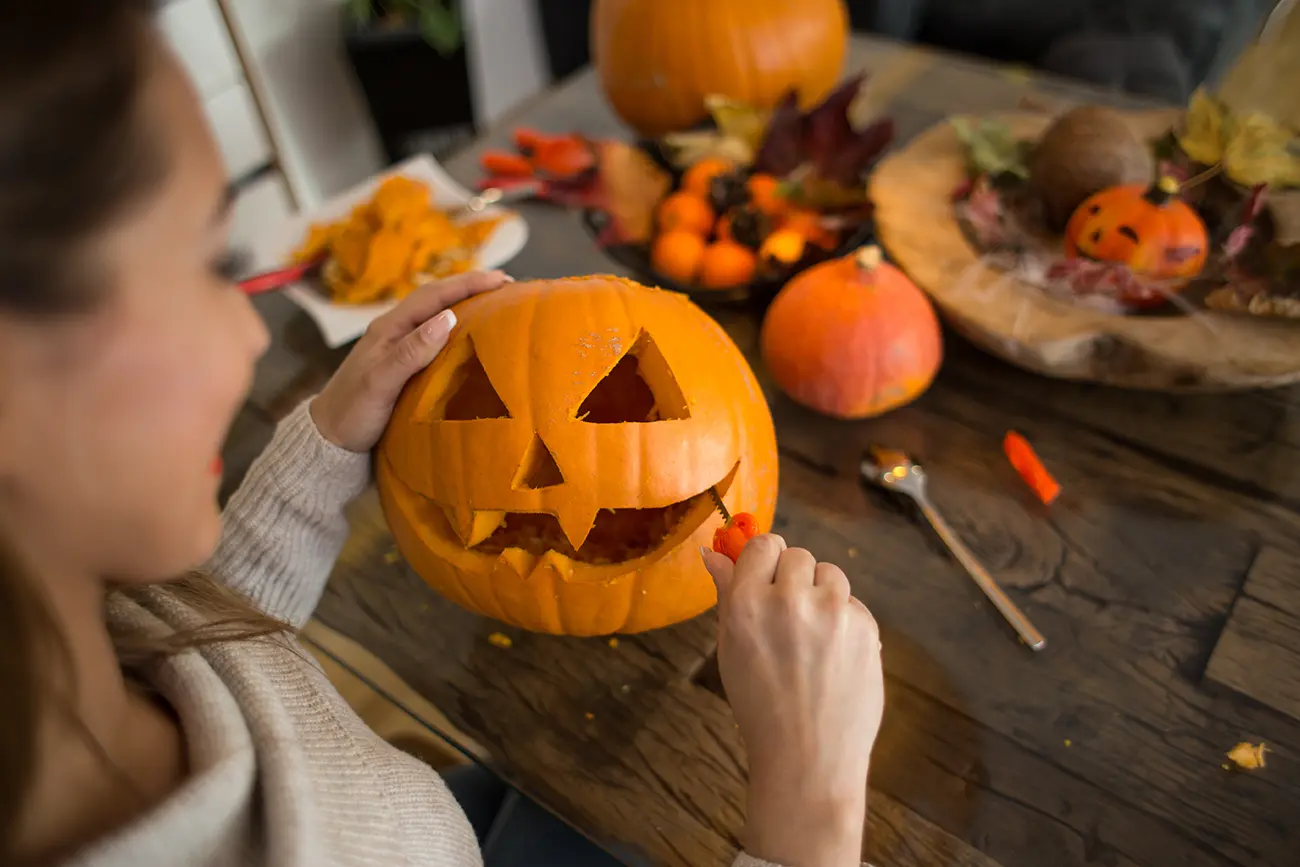
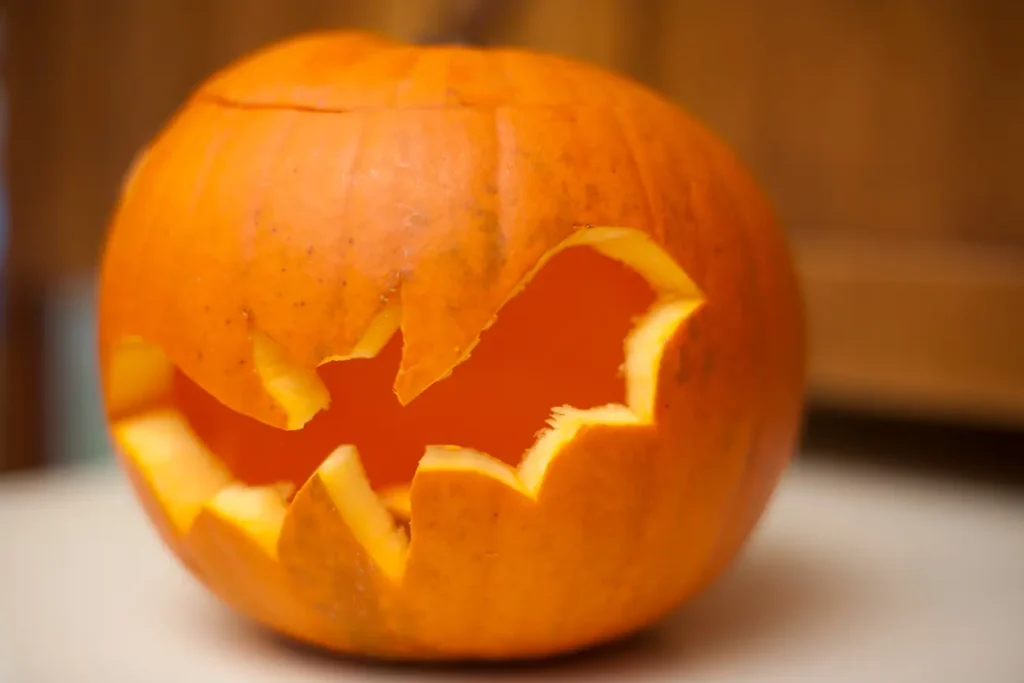
- Classic Jack-o’-Lantern: Carve a traditional Jack-o’-Lantern (see how to choose the best jack-o-lantern) face with a toothy grin and triangle eyes. This timeless design never goes out of style.
- Eerie Silhouettes: Make spooky shapes on pumpkins like bats, spiders, and haunted houses. Looks eerie when lit inside.
- Character Creations: Turn your pumpkin into a favorite character by carving its features. Think cats, witches, monsters, or even beloved movie characters.
- Glowing Patterns: Carve out patterns like stars, moons, or swirls to create a mesmerizing glow when the pumpkin is illuminated.
- Message Pumpkins: Carve spooky words or phrases onto many pumpkins for creating a message or displaying your favorite Halloween saying.
Non-Carved Halloween Pumpkin Design Ideas:
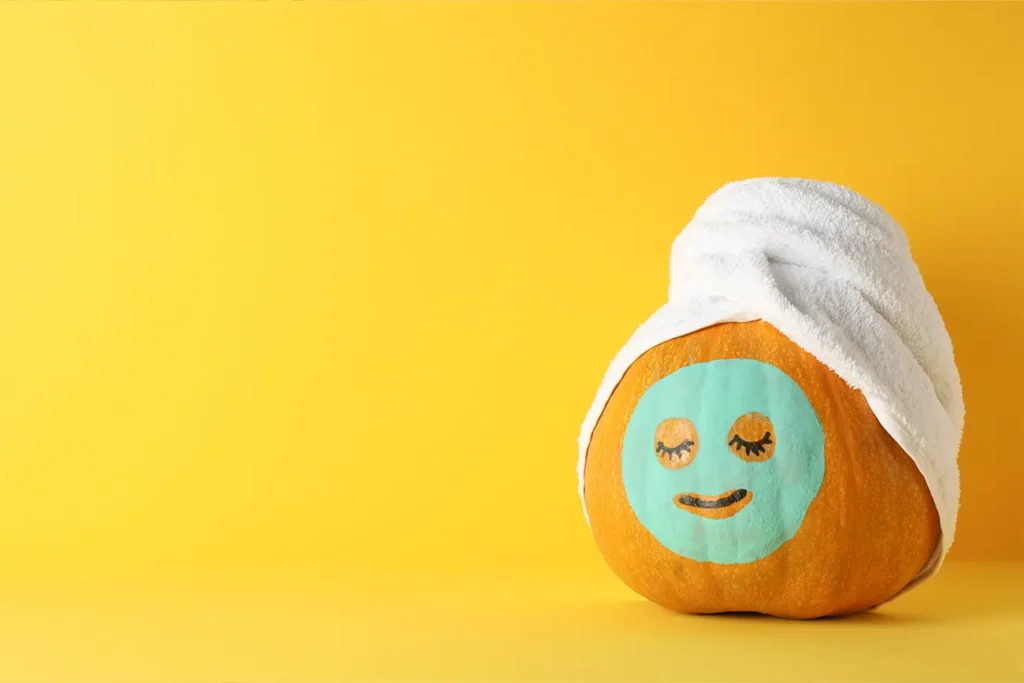
- Painted Pumpkins: Use acrylic paints to decorate pumpkins with colorful, detailed patterns. There are countless choices, from cute faces to intricate scenes.
- Glitter Glam: For a wonderful, dazzling appearance that catches the light, adhere glitter to your pumpkin and sprinkle it with glue.
- Decoupage Delight: Use glue to cover your pumpkin with scraps of colorful tissue paper or printed napkins. This results in a textured and colourful appearance.
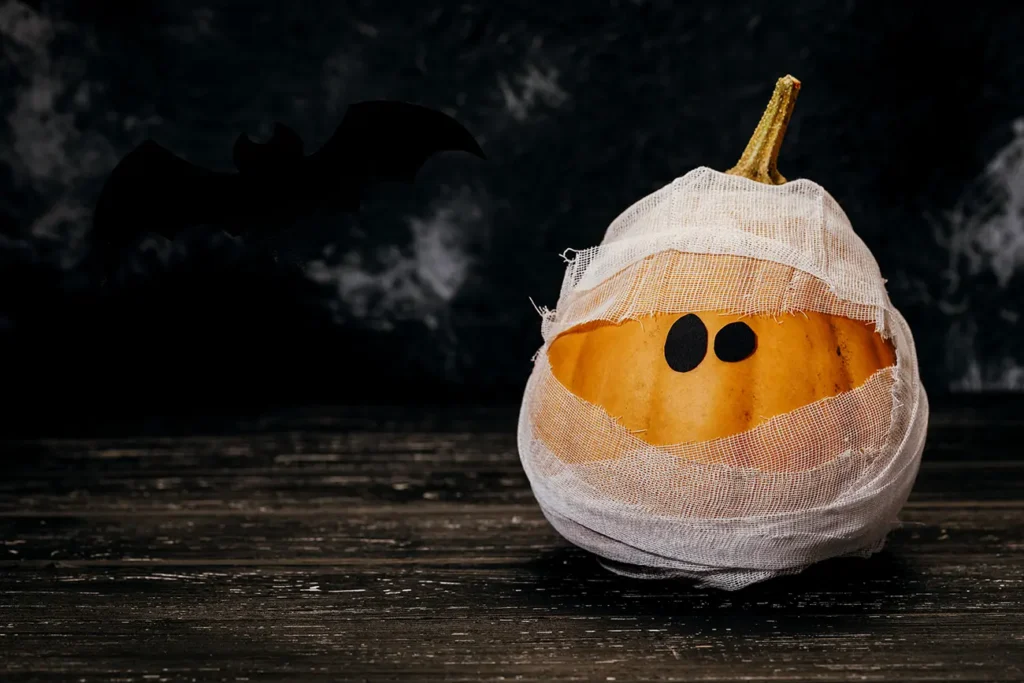
- Mummified Pumpkin: Cover your pumpkin with gauze or cheesecloth, exposing only the stem and a few other components. This gives it a mummy-like appearance.
- Faux Creatures: Attach fake spider legs, googly eyes, or other small decorations. This gives your pumpkin a playful and quirky character.
Choosing the Best Pumpkin for Fall Décor and Carving
Fall is a fun time for decorating with pumpkins and other fall stuff. The main star of autumn decorations is the pumpkin which many people like.
The Perfect Carving Candidate is the Jack-O’-Lantern Pumpkin
The Jack-o’-lantern heirloom pumpkin, often simply referred to as the “Jack-o’-lantern,” is a classic variety that has graced many a doorstep during the Halloween season. Characterized by its vibrant orange hue, this pumpkin typically boasts a smooth, slightly ribbed surface, making it an ideal canvas for carving spooky faces and intricate designs.
While its exterior is undeniably iconic, the inside of the Jack-o’-lantern pumpkin is equally noteworthy. It possesses a moderately thick flesh that is both sweet and slightly nutty, making it suitable not just for decoration but also for culinary delights. From pies to soups, this versatile pumpkin can be transformed into a myriad of dishes.
Growing to an average size of 10-20 pounds, the Jack-o’-lantern is a medium-sized pumpkin. Its round to slightly oblong shape, combined with a sturdy stem, makes it a favorite among pumpkin pickers. As an heirloom variety, it has been passed down through generations, preserving its authentic characteristics and ensuring its continued popularity in both gardens and holiday traditions.
The jack-o-lantern pumpkin is also the top choice when it comes to choosing the best pumpkin for carving. These pumpkins are particularly well-suited for carving elaborate and detailed decorations because they have thinner walls than their counterparts. The thinner walls allow for easier cutting and scooping, ensuring that your carving experience is enjoyable and yields impressive results.
Here are some tips on choosing your Jack-o’-lantern for carving:
1. Look For Freshness and Sturdiness
Before embarking on your carving adventure, it’s important to ensure that the chosen pumpkin is fresh and robust. A key indicator of a healthy pumpkin is a sturdy stem that’s firmly attached. A wobbly or weak stem could mean the pumpkin was picked too soon or won’t last for Halloween.
2. Color Clues: Identifying the Ideal Pumpkin
The color of the pumpkin can reveal a lot about its quality and readiness for carving. Look for pumpkins that boast an even, deep, and rich orange hue. If the pumpkin’s color is even, it’s ready for spooky carving.
3. Texture Matters: Optimal Surface for Your Design
The texture of the pumpkin’s skin is another aspect to consider. A smooth exterior with shallow ridges is ideal for carving. This type of surface provides a clean and even canvas on which you can trace and carve intricate designs with precision.
4. Hollow Confirmation: The Sound of Carving Success
Upon selecting a pumpkin, give it a gentle knock. A hollow sound suggests that the pumpkin has thinner flesh inside, which makes carving easier and more efficient. This is because the hollow space inside allows for greater maneuverability when working with your carving tools.
5. Spotting Ripeness: A Check at the Bottom
To further check the pumpkin’s freshness, examine the bottom. Any signs of mushiness or softness can show that the pumpkin is overripe and might not hold up well after carving. While some imperfections can add character, soft spots should be avoided.
6. Handling with Care: Carrying Your Chosen Pumpkin
To maintain the integrity of your pumpkin throughout the carving process, it’s best to handle it with care. When transporting your chosen pumpkin, support it from the sides rather than by the stem. Carrying it by the stem could risk breaking it off, which can affect the pumpkin’s longevity.
7. Timing Is Key: Duration of Your Carved Creation
While pumpkins can be chosen well in advance, it’s important to note that carved pumpkins have a limited lifespan. A carved pumpkin will last around four to five days before it starts to show signs of decay. Carve your pumpkin closer to Halloween for an impressive holiday creation
Carving Your Halloween Pumpkin
How Should I Carve My Halloween Pumpkin?
- Choose a smooth, cold pumpkin. Cover your table with paper – it’s the key to quick cleanup.
- Wash the pumpkin (see tips below for preserving a carved pumpkin), then cut a circle in the top for the lid with a knife. Slope the cut to prevent the lid from falling in.
- It’s time for the good adventure! Scoop the seeds and goo out with a spoon. If you like snacking, save the seeds.
- It’s design time! With a marker, draw a simple ghost or star shape on the pumpkin.
- Carve gently, following your design. First and foremost, safety!
- Insert a candle or light, close the lid, and turn down the lights. Your work shines – congratulations!
Tip: If at all possible, keep your pumpkin cool. If it becomes wrinkly or moldy, it’s time to throw it out.
How to Preserve Your Carved and Uncarved Pumpkins
Halloween is a time for spooky fun, and pumpkins play a big role in the festivities. Whether you’re into carving intricate designs or keeping pumpkins whole, it’s important to know how to make them last longer. Here are some simple tips to help you preserve your carved and uncarved Halloween pumpkins.
Preserving Carved Pumpkins:
- Gut and Clean: Before you start carving your pumpkin, make a hole in the top and remove all of the seeds and stringy pieces. Use extreme caution while using your hands or a large spoon!
- Scrub inside: Give the interior a thorough scrub with a spoon or scraper after the insides have been made hollow. This helps get rid of any lingering sticky components.
- Dry very well: Make sure the pumpkin is completely dry before you begin carving your design. To pat it dry, use paper towels or a fresh cloth.
- Avoid Mold: Use a solution of water and bleach to stop the formation of mold. Brush the interior of the pumpkin with a solution made by combining 1 tablespoon bleach with 1 quart water.
- Protect from the Elements: Carved pumpkins can become mushy when exposed to sunlight and heat. Place them in a cool, shaded area to keep them looking their best.
Troubleshooting Tips for Carved Pumpkins
1. Carved Too Early? Keep It Wrapped:
If you carve your pumpkin too early for Halloween, follow these steps to keep it fresh.
Solution:
- Wrap the carved pumpkin in plastic wrap.
- Place the wrapped pumpkin in the refrigerator when you’re not displaying it.
2. Protecting with Petroleum Jelly:
Worried about using harsh chemicals? Here’s an alternative solution.
Solution: Apply petroleum jelly on the carved parts of the pumpkin.
Benefit: The jelly acts as a protective layer, retaining moisture and preventing drying.
3. Reviving Shriveled Pumpkins:
Did your pumpkin start shriveling before the holiday? Don’t worry, you can still revive it.
Solution:
- Prepare an ice bath with a little bleach added (remember to remove lights/electronics).
- Dip the pumpkin in the ice bath.
Result: This quick trick fights mold and brings the pumpkin back to life.
Remember, these tricks can make your pumpkin last longer and look great for Halloween!
Preserving Uncarved Pumpkins:
- Choose Wisely: When picking pumpkins, go for ones that are firm and free from soft spots or bruises.
- Store in a Cool Place: Find a cool and dry spot for your uncarved pumpkins. They’ll last longer away from direct sunlight and moisture.
- Avoid Dampness: Moisture can speed up the decaying process. Keep your pumpkins off wet surfaces.
- Inspect Regularly: Check your uncarved pumpkins for any signs of softness or mold. If you spot any, it’s time to say goodbye.
- Cold Nights: If the weather turns cold, bring your pumpkins indoors to shield them from freezing temperatures.
Follow these steps for festive pumpkins all season.
Pumpkin Pollution is a Problem
Pumpkin Pollution is a Problem—Here’s What You Can Do
Pumpkin pollution is a worry because many pumpkins wind up in landfills after Halloween. Methane, a damaging greenhouse gas that contributes to climate change, is released when pumpkins degrade in landfills. This is an issue because methane stores heat in the atmosphere and contributes to global warming.
But there is good news: there are things you can do to make a difference! Consider composting your pumpkin instead of throwing it away after Halloween. Composting is a natural process that converts organic waste into nutrient-rich soil. When you compost a pumpkin, it breaks down in a way that produces less methane, and the resulting compost can be used to feed gardens and plants.
Here’s a quick guide to composting your pumpkin:
- Remove Any Decorations: Before composting, remove any decorations that may be harmful to the composting process, such as candles or paint.
- Break It Down: Cut your pumpkin into smaller pieces to help it break down faster in the compost bin.
- Choose a Composting Method: If you have a backyard, you can start a compost pile or use a compost bin. If you don’t have access to a garden, consider looking into local composting programs or facilities.
- Mix in browns and greens: For successful composting, combine your pumpkin with other compostable items such as leaves, grass clippings, and paper or cardboard (greens). This results in a well-balanced mixture that decomposes quickly.
- Turn the Compost: Give the compost a moderate mix or turn now and then. This promotes uniform breakdown of the components and maintains the compost healthy.
- Wait and Use: Your pumpkin and other materials will decompose over time into nutrient-rich compost that you can use to improve your soil and boost plant development.
Composting your pumpkin not only helps to reduce pumpkin-related pollution, but it also contributes to a healthy ecosystem and helps to reduce the impact of trash on our world. So, this Halloween, think about composting your pumpkin – it’s a tiny effort that may make a big difference!
There you have it!
Pumpkins are more than just festive decorations; they’re a symbol of the vibrant and rich traditions of autumn.
From the classic Jack-o’-lantern heirloom pumpkin that lights up our doorsteps to the myriad of ways we can decorate, carve, and even consume them, pumpkins truly encapsulate the spirit of the season.
As we embrace the joys of fall, it’s essential to remember the environmental impact and consider sustainable practices like composting. By doing so, we not only celebrate the season but also contribute to a greener planet.
So, as you pick out your perfect pumpkin this year, remember the stories, traditions, and responsibilities it carries with it.
Happy pumpkin-ing!