
With all the hubbub going on with Unity, many developers have jumped ship and moved to other game engines. Godot is increasingly becoming the popular choice among developers, and for good reason. Its open-source nature, powerful features, and user-friendly interface make it an attractive option for both beginners and seasoned professionals. In this article, we’ll go through the basics of getting started with Godot.
Downloading and Installing Godot
To download Godot, head over to the official Godot website and download the version that suits your operating system. Godot is available for Windows, macOS, and Linux. One of the first things that are great about Godot is that it is self-contained and does not require installation – it’s also lightweight. Just export the downloaded zip file and run the executable (.exe).
Create a New Project
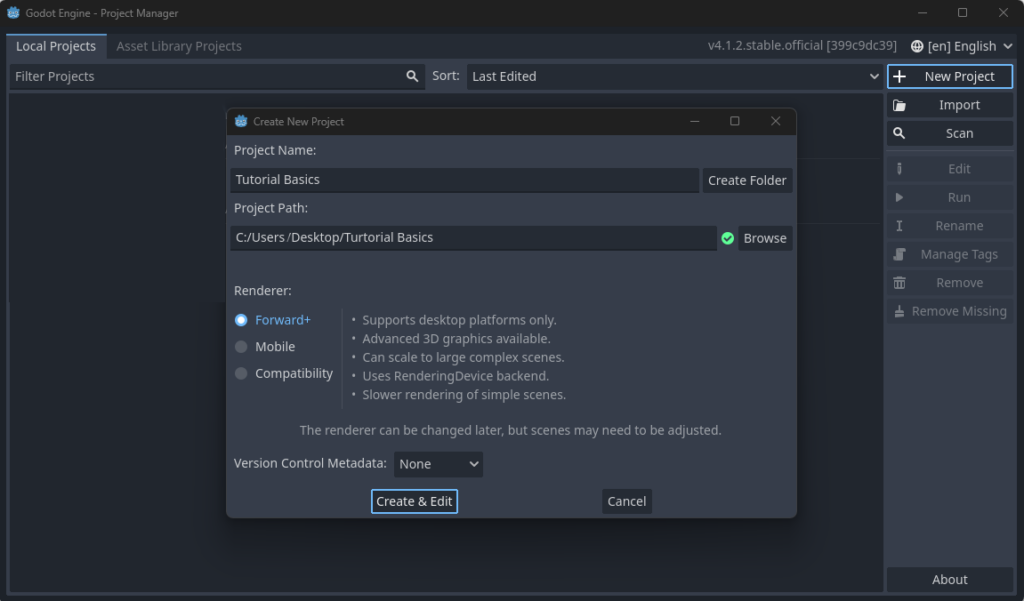
To start, click on “New Project.” Choose a name and a location on your hard drive to save it. Godot will then set up a new project for you.
The files for your game will be contained in this single folder. Godot requires that the folder be empty when starting a new project. Choose your appropriate renderer and select Create & Edit.
You’ll be taken to the main editor window, where the real fun begins.
Familiarizing Yourself with the Interface
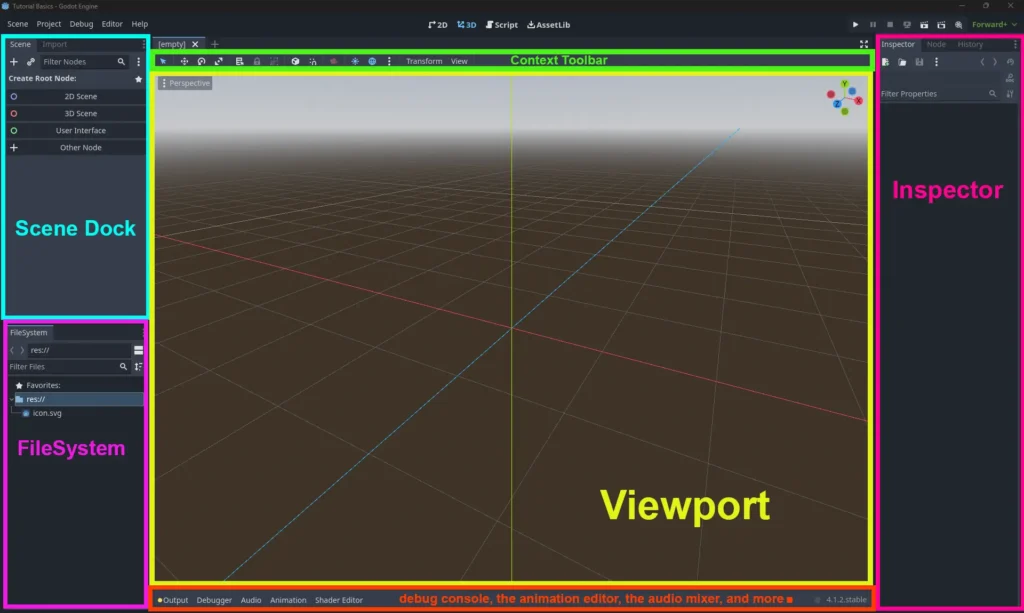
Once you’ve created a new project, you’ll be greeted with a welcoming and intuitive interface. Spend some time getting to know the layout.
Key areas include:
- The Scene Panel: This is where you’ll build your game’s world.
- The Inspector: Here, you can tweak the properties of any selected object.
- The FileSystem Dock: This is where all your project files are managed.
- The Node Tree: It shows the hierarchy of elements in your current scene.
Understanding Nodes and Scenes
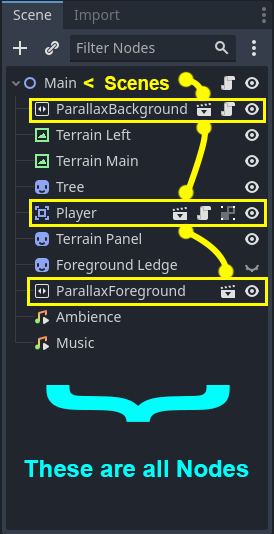
In Godot, everything is a node. These nodes can be anything from sprites, sounds, scripts, or even game levels. A collection of these nodes makes up a scene, which could be a character, an item, or an entire game level.
Here’s an example of a “Main” Scene with other scenes (also nodes) and other nodes nested within:
Building a Simple Scene
Let’s create a simple scene:
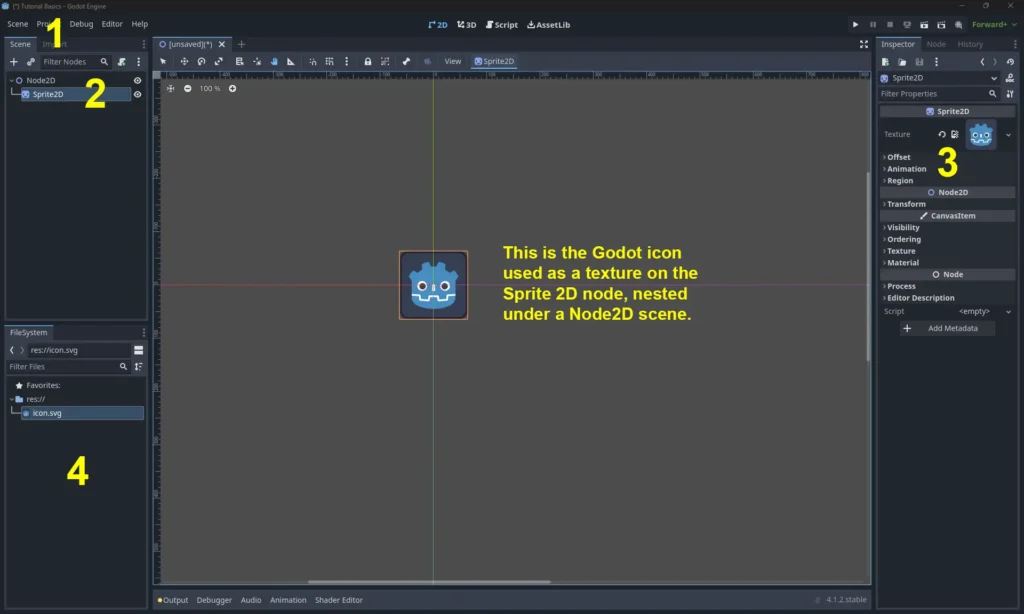
- Click on the “+” button in the Scene Panel to add a new node.
- Choose a “Node2D” for a 2D game or “Spatial” for a 3D game.
- Add child nodes, like a “Sprite” for 2D or “MeshInstance” for 3D, to your main node.
- Import assets like images or models and assign them to your nodes.
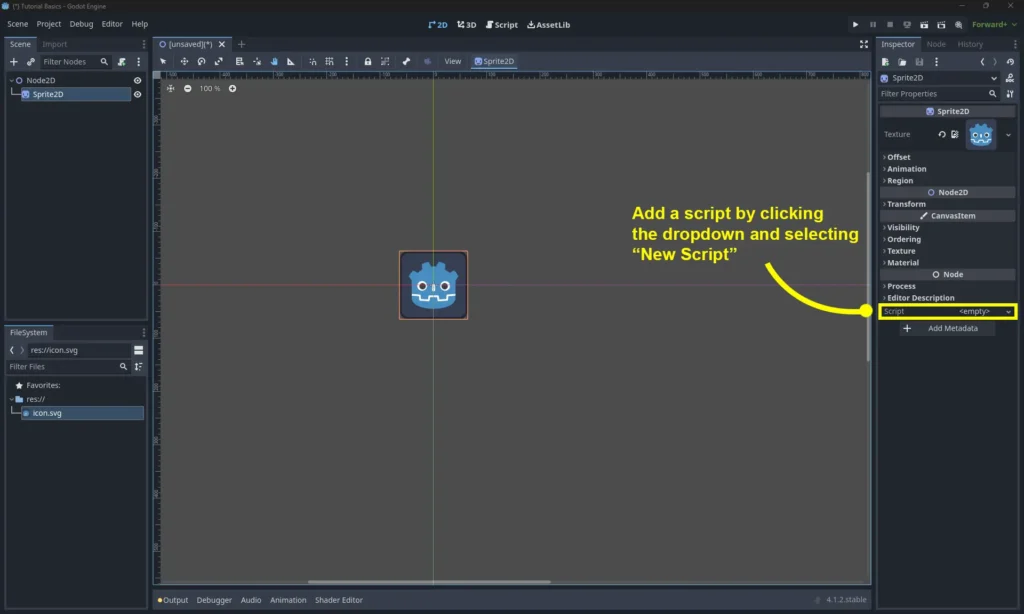
Scripting Basics
Godot uses its own scripting language called GDScript, which is similar to Python. To add a script, select a node, and click the “Attach Script” button. A basic script editor is built into Godot, making coding convenient.
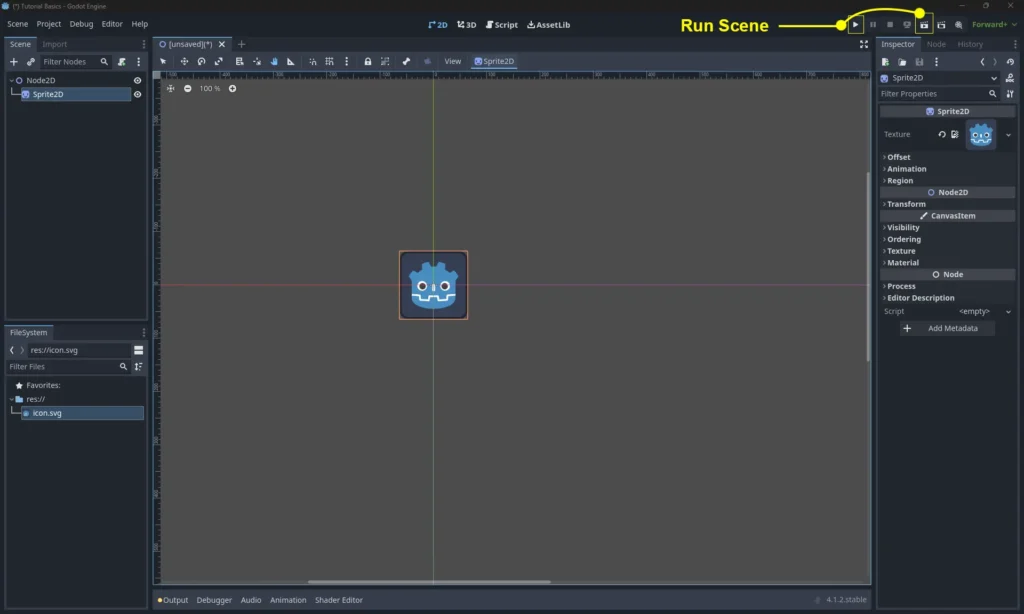
Running Your Scene
To see your creation come to life, click the “Play Scene” button (shaped like a clapperboard). If everything is set up correctly, you’ll see the Player version of the scene you just created.
Exploring Further
Once you’ve got the hang of the basics, it’s time to dive deeper. Godot offers robust features such as animation tools, physics engines, and more.
The official documentation is an excellent resource for learning.
Conclusion
Godot is a powerful, versatile game engine that offers a wealth of possibilities for game development. Its ease of use and comprehensive features make it an excellent choice for those looking to transition from other engines or just starting in game development. Remember, practice and patience are key. Happy developing!